Studio
Start from a photo and give it a look, a new background, a frame or some Magic, add text and shapes in layers, then export a picture or animate it into an edit.
Studio is the photo editor. Each thing you make there is a design, one picture: a feed post, a product shot, a poster, a story or a thumbnail. You usually start from a photo and work on it with the photo tools, and everything on it is a layer you can move, size, hide, lock and blend: the photo, any text, shapes and other pictures. Everyone in the workspace can open a design, and editors can change it at the same time.
Start a design
Open Studio in the sidebar (on a phone, tap More, the lime button beside the tab bar, then Studio) and choose New design. On a Library photo, Edit in Studio does the same with that photo. Pick a photo from your Library, or upload one. The design opens sized to the photo (a portrait post, a square, a story or a landscape, whichever is nearest), with the photo filling it on a white background. Start blank instead makes an empty portrait design. You can change the size later from the menu under the design. To rename or delete a design, use the menu on its tile (press and hold on a phone).
Home also has a Latest from Studio row with your newest designs, and All of Studio opens the full list. If you have none yet, the row has a Start from a photo button.
You can also ask the Agent from any page, for example "make a 4:5 post for the spring drop with the rooftop shot and a lime sticker". It makes the design with its layers and opens it. Inside a design, the sparkle in the top bar opens the Agent beside it.
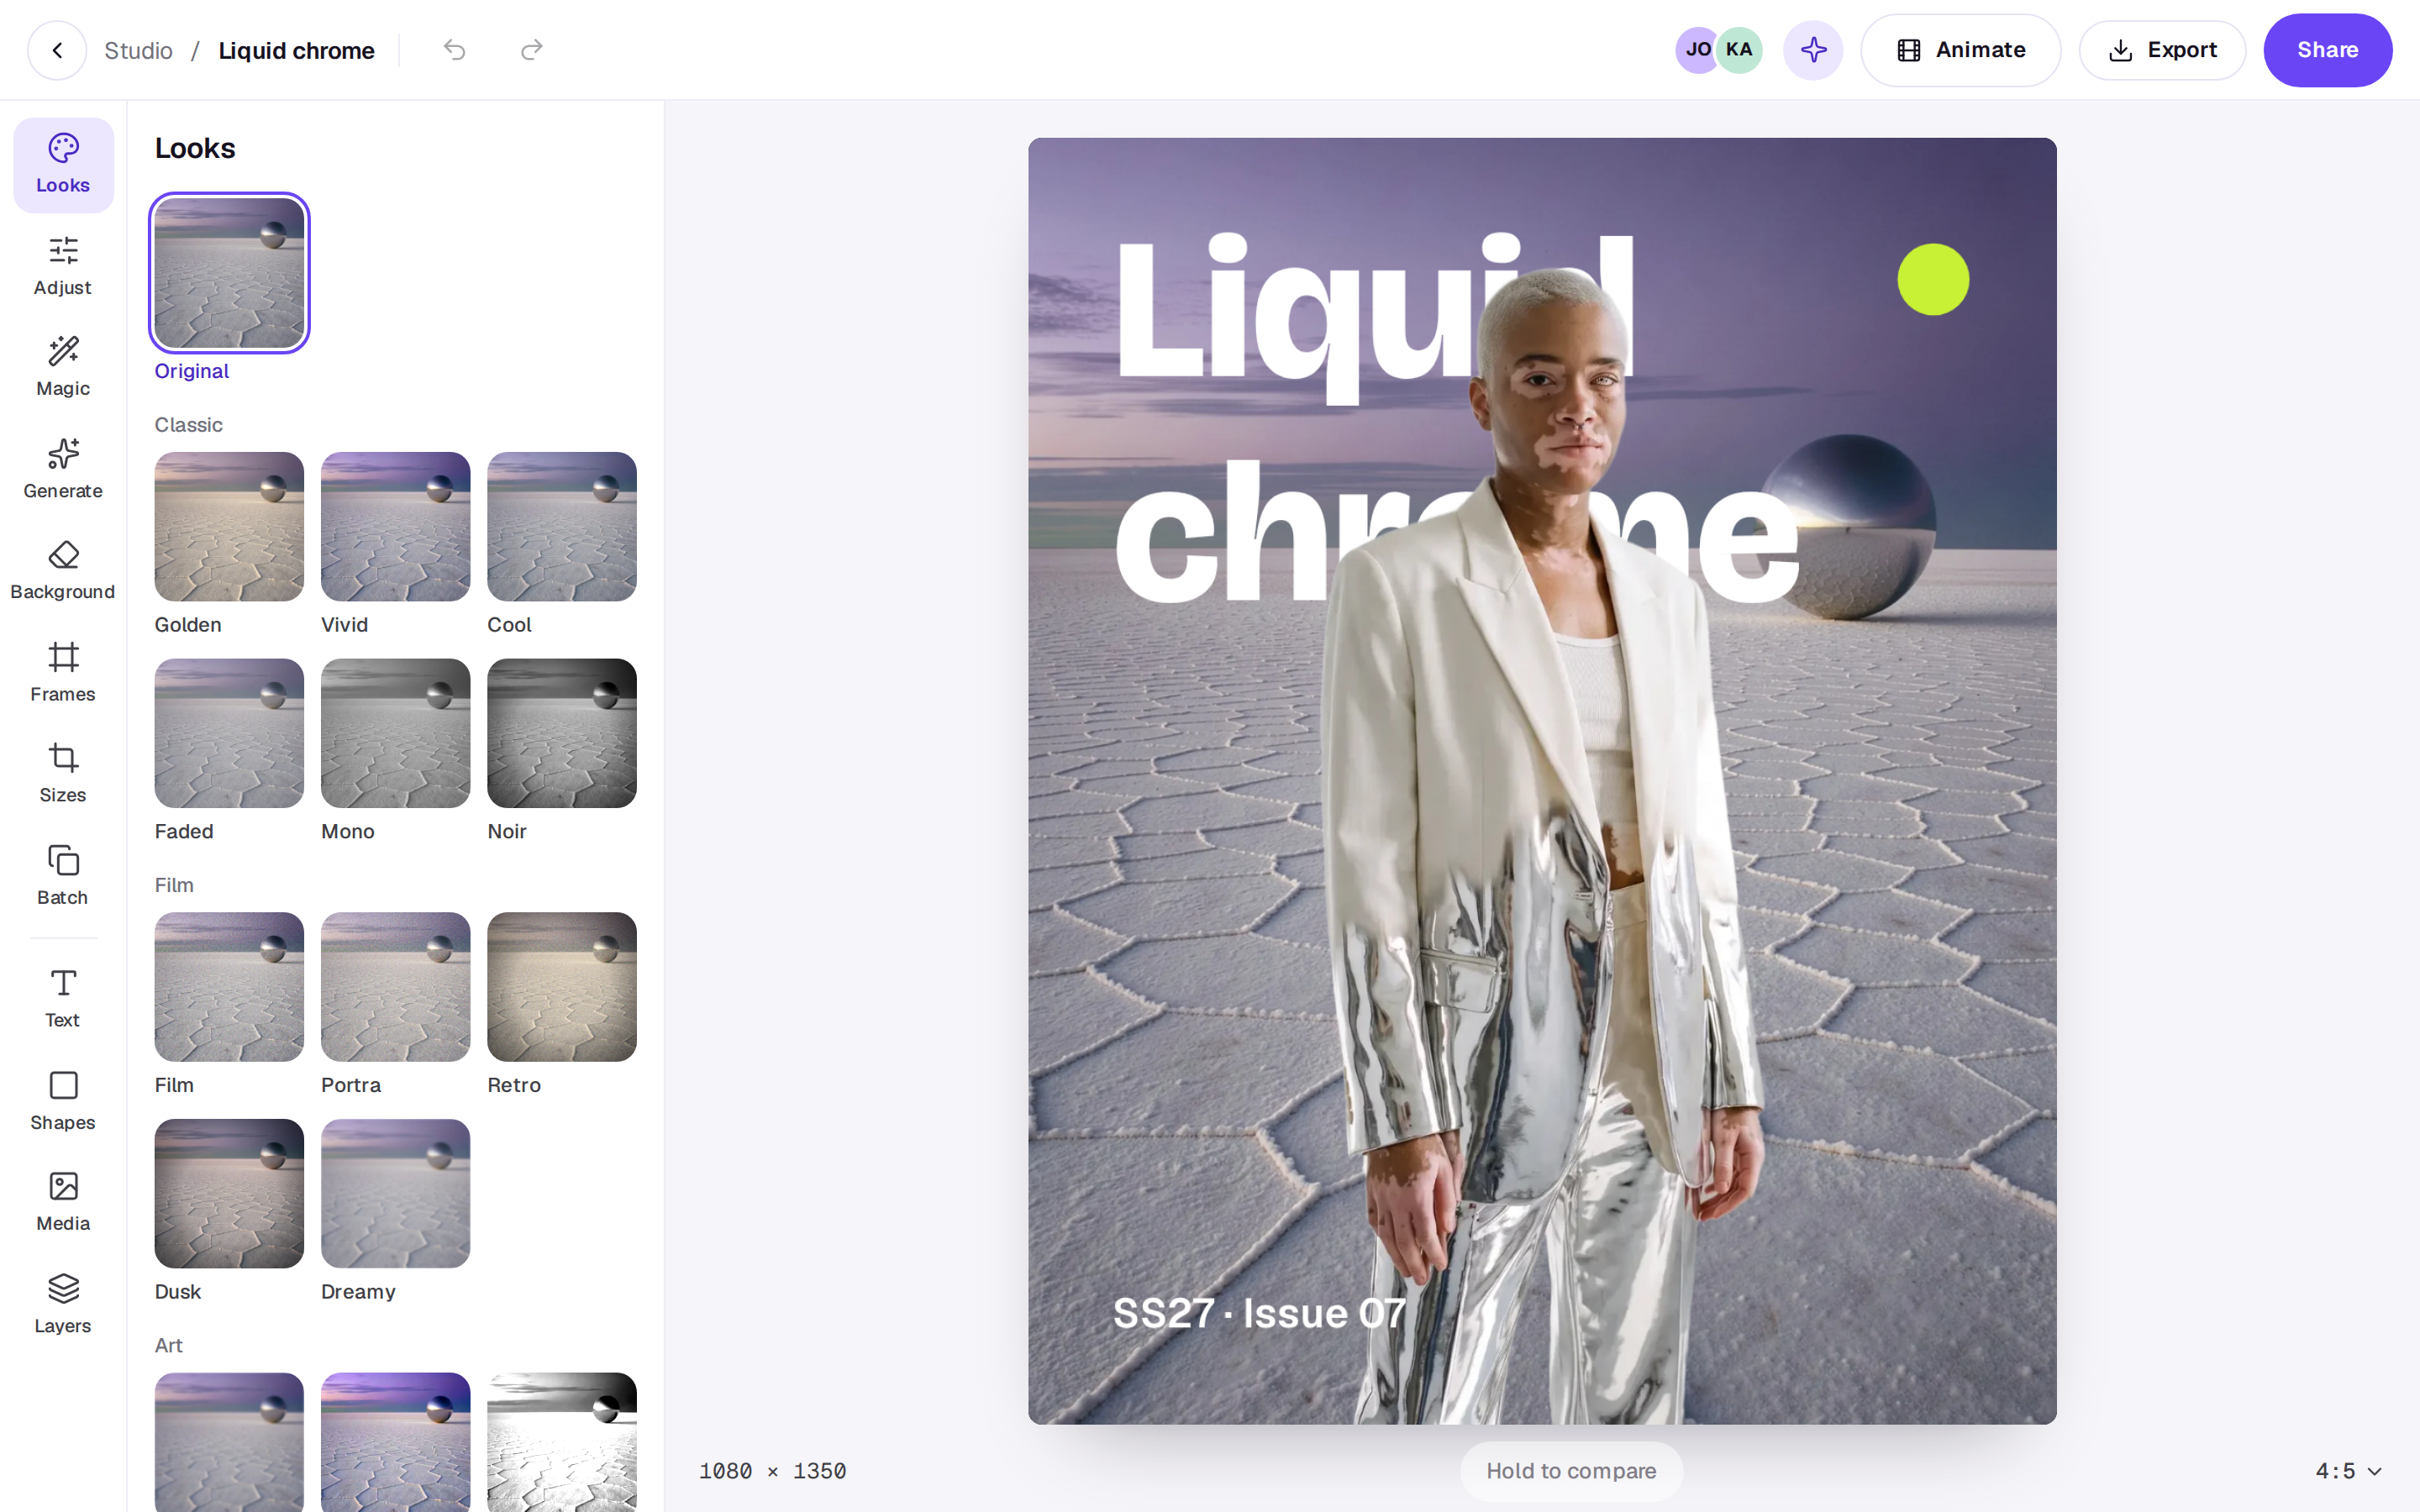
The photo tools
The tools down the left (along the bottom on a phone) work on the photo: the photo layer you've picked, or else the biggest photo on the design.
- Looks: one tap to give the photo a look, each shown on your own photo: Golden, Vivid, Cool, Faded, Mono and Noir; film looks with grain (Film, Portra, Retro, Dusk, Dreamy); art looks (Painterly, Pop art, Sketch); and wild ones (Pixel, Glitch, Mirror, Kaleido, Negative). Pick one and a strength slider appears at the top. Original takes it off. Looks are free.
- Adjust: sliders for light, contrast, colour, warmth, tint, highlights, shadows, fade, vignette, grain, sharpen and blur. Double-click a slider to put it back, or choose Reset for all of them. They're free and stay when you change the look.
- Magic: makes a new photo from yours with an image model, each at the price it shows. Expand carries the photo on past its edges to fill the design's shape, for a photo that doesn't fit it. Remove takes out what you name ("the bin in the corner"). Change anything does what you type ("make it golden hour"). Or tap an effect, each shown on a sample: Enhance, 3D figurine, Anime, 3D animated, Pro headshot, Instant photo, Claymation, Oil painting, Pencil sketch, Cinematic, Studio product, Neon night and 1970s.
- Generate: makes a new picture from what you describe, shaped like the design, on the model you pick, one to four at a time. Tick Make it from this photo to send the design's photo to the model as a reference. Each picture goes on as a layer of its own on top when it's ready.
- Background: Remove background cuts out the subject (a few a day are free). Then put something behind it:
- Make a background with AI: pick a style (Studio, Pastel, Marble, City bokeh, Sunset sky, Concrete, Botanical, Podium) or describe one, choose how many, and they're made behind the photo, so the subject stays exactly as it is. If the photo isn't cut out yet, it's cut out first. Every background you make is kept: tap one in the row at the top to show it, or None to go back to a colour.
- A colour behind, from the colours there (your brand's first).
- Blur the background: a blurred copy of the photo behind its cutout.
- Somewhere new, relit to match: pick a scene or say where, then Make the scene (a few a day are free). This makes a new photo of the subject in the scene with the light to match, and takes the photo's place.
- Frames: lays the photo inside a border: white, an instant-photo border with a deeper bottom, a wide gallery mat, black, violet or lime. The border is the design's background colour.
- Sizes: the design in every size it's going to: a post (4:5), a square, a story (9:16), a banner (16:9), a pin (2:3) and a shop listing (2000 by 2000 on white). Each is shown as it'll come out: the photo fills it or sits in its frame, and text and shapes keep their place. Tick the ones you want and choose Export: one saves a PNG, several a zip.
- Batch: this design's look on more photos. Pick up to 20 from your Library, and each gets a design of its own with the same looks, sliders, frame, text and background. Tick Remove each background to cut each one out too (a few a day are free, then credits each); the cutouts take their photos' places as they land. Find the new designs in Studio.
Magic, Generate, a cutout and a new scene take a little while. A note over the design says what's being made, and when it's ready the new photo takes the old one's place in its layer, in the same spot. Undo puts the photo back. Each result is also kept in the design's files (Media) and your Library. If you close the design before it's ready, it waits in Media for you to add.
Hold Hold to compare under the design (at the corner of the design on a phone) to see the photo as it started, without looks, sliders or anything Magic or Background did. Let go to come back.
Ask the Agent
The sparkle in the top bar opens the Agent beside the design. It sees the design's layers and what's been done to each, and works on it for you:
- Free changes happen at once, each one step Undo takes back: "give it the Film look at half strength", "warm it up a bit", "put it in a white border", "make the background lavender", "add 'Spring drop' as a headline".
- The AI tools come as a card in the conversation: "cut her out and put her on a marble counter", "give me two pastel backgrounds", "make it a 3D figurine", "take out the bin", "fill it out to a story". A card that costs a little starts after a few seconds, with Stop to cancel before anything's spent; a dearer one waits for you to press Make it. What it makes lands on the design like the tool's own button would.
- A picture you ask it to make goes on the design as a layer of its own on top.
Add layers
- Text: a headline, subheading, body text or a label, and your brand's name in its typeface when you have a brand.
- Shapes: a rectangle, a circle or a colour fill that covers the whole design.
- Media: this design's files. Upload more, or bring them in from your Library. Choose + on a file to add it as a layer.
- Layers: every layer, the front one first. Choose + to add a photo or video, text, a rectangle or a circle.
Change a layer
Click a layer on the design, or in the Layers list, to pick it. Drag it to move it, and drag a corner to size it. Its centre snaps to the middle. The panel at the right has the picked layer's settings:
- Text (text layers): the words, typeface, size, weight, alignment and colour.
- Arrange: its position and size in pixels, rotation for photos and videos, centring, and Fit or Fill to fit a photo inside the design or cover it. Send back and Bring forward move it down or up the stack.
- Look: its opacity and blend mode (Multiply, Screen, Overlay and the rest), the colour of a shape or fill, and how round a rectangle's Corners are.
In the Layers list, drag a row up or down to restack it, double-click a name to rename it, and use the eye and lock beside a layer to hide it or stop it moving. A locked layer can't be picked or dragged on the design, so unlock it first. The background starts locked. Arrow keys nudge the picked layer (Shift for 10 pixels), ⌘D duplicates it, Delete removes it, and ⌘Z undoes.
Export, share and animate
- Export saves the design as a PNG or a JPEG at its full size, drawn by the same engine you see in the editor, looks and all.
- Share sends a review link, as for an edit.
- Animate makes a new edit from the design, each layer a clip five seconds long, so you can add motion, music and captions in the editor. The design stays as it was. Animate and the Agent's sparkle are in the top bar on a computer.
A real person in Melbourne will write back, usually within one business day.